Sunday, November 13, 2011
Hofner Colorama II restoration project (part 4) - stripping and scraping the paint off the body
In the continuing sage of our vintage Hofner Colorama II restoration project, today we will be stripping and scraping the paint off the guitar body itself.
If you’re already following the project, you’ll be well aware that we’ve already removed the neck. This is what we’re left with:
Stripping a vintage Hofner Colorama (by which I mean stripping it of its components, not the paint, though we’ll be doing that too) is extremely easy.
First we take out all the scratchplate/pickguard screws, allowing us to lift the whole thing out, including the output jack, in one go.
Next we remove the front vibrato/tremolo cover as follows (you should unscrew the tremolo arm before doing this – in this particular project, removing the arm was a bit of an adventure in itself and will be documented later, but usually you simply unscrew the little thumbwheel and the arm comes off easily):
Now the back vibrato cover:
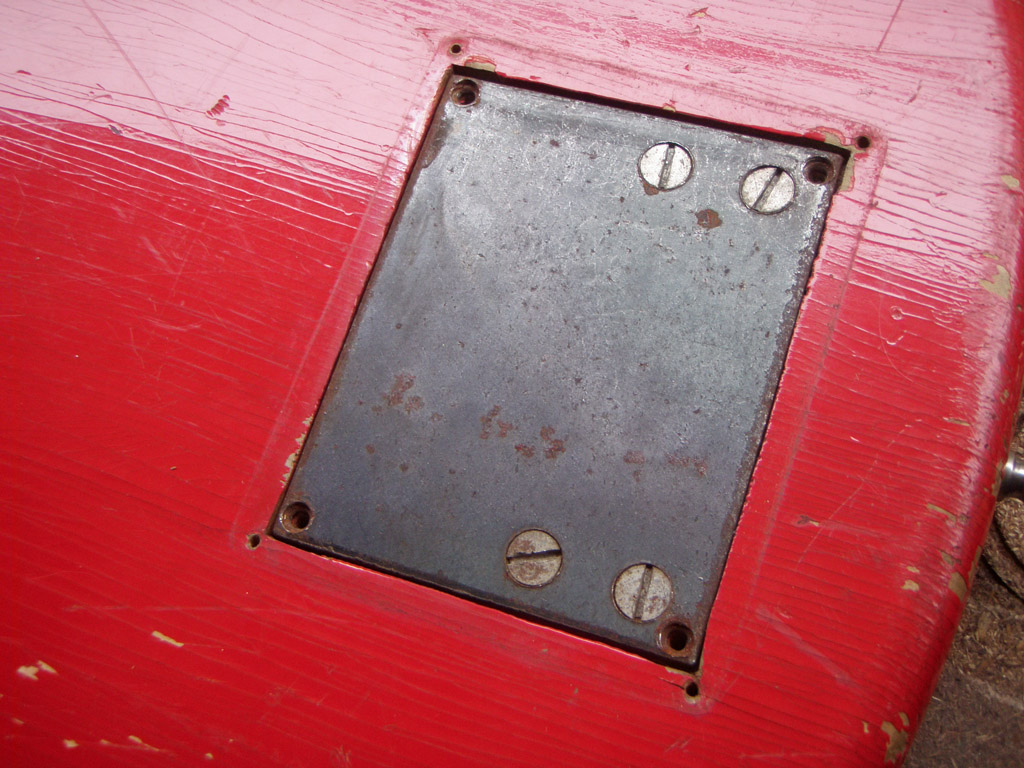
The vibrato itself is secured with four screws in its corners, so we remove these too.
Once the screws have been removed, we simply lift the unit out, as follows:
Lastly we unscrew the strap buttons:
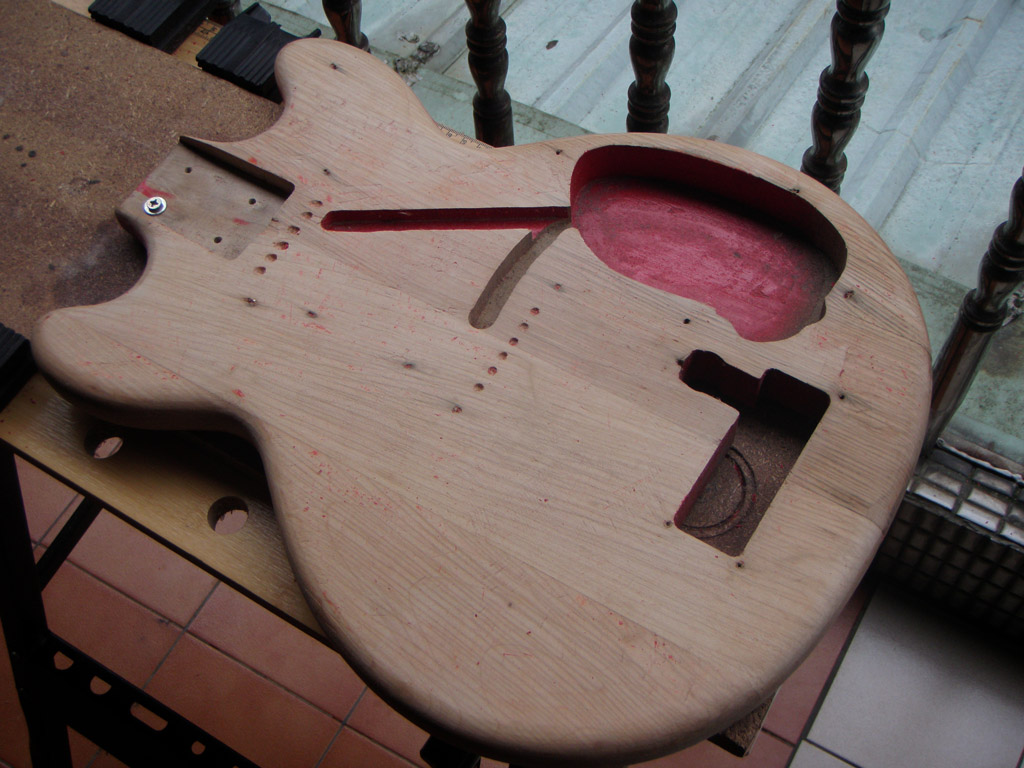
We are now left with the following.
Front:
Back:
A quick inspection reveals a number of issues that will need to be dealt with at a later date, namely a couple of screw holes that are too close to an edge and have started falling through, such as this at the front of the tremolo cavity:
And this at the lower side of the scratchplate:
There are also two broken screws that will need to be drilled out at a later date. One is in the top front corner of the scratchplate:
And the other is one of the rear vibrato cover screws (the bottom left hole in this photo):
We will deal with these (and other) issues in the next installment. In the meantime, let's scrape some paint off.
As with the guitar neck, we need to secure the body before we start scraping the paint off. In this case we have put one screw through one of the neck pocket holes and secured it to a piece of wood. At the other end of the guitar we have just used two sprung grips, as shown here. These provide more than enough grip, without damaging the guitar.
Then begins the slow process of scraping the paint off with a paint scraper.
About 60% done
And that’s the front finished:
Here we are about halfway through scraping the back of the guitar:
Almost there:
Several hours, band-aids, mosquito bites and swear words later, and we’ve finished scraping the paint off the guitar.
In all seriousness, that was about seven hours of work, and not a job I’m in a hurry to repeat. And did I mention the mosquitoes? (Don't feel sorry for her - that's MY blood.)
Sunday, November 6, 2011
Hofner Colorama II restoration project (part 3) - re-fretting the guitar neck
In the last blog post, we stripped down and de-fretted a vintage Hofner Colorama II neck. Today we’ll re-fret it.
First of all, we need to do some initial preparation, so we lay the neck out on its jig just like in the previous post and then sort out the fret wire. These frets have been bought pre-cut and pre-radiused. They’re not all the same length, so we need to sort them in order of shortest to longest. Here we’ve punched holes (don’t use the frets to do this!) in an empty cardboard box and placed the frets in them in the correct order.
Next thing we need to do is clean all of the dust, etc., out of the fret slots. A thin craft knife will suffice for this, but do it in the opposite direction to the knife edge (in other words, if the blade is pointing forwards, then pull the knife backwards). Remember, we’re not actually cutting anything here, just pushing all of the dust out of the slots.
Next we take our shortest fret and do a test fitting in the first fret slot.
Uh-oh, it seems the fret slots on this 50-year-old neck are very thin and will need to be widened to 0.8mm in order to fit this more modern fret wire. Luckily the blade on this hack saw is just the right thickness (phew), so we can continue. Be extremely careful cutting the slots as you can easily pull a chunk of wood off the fretboard surface by accident.
Here you can see the difference between one of the original fret slots (top) and one of the new slots (bottom).
Also, you may notice that, despite extreme care, cutting the new slot has pulled up a bit of extra material from the top surface of the fretboard, so for the rest of the slots we will use tape, as follows (you can’t really see it in this photo, but if you run your fingernail down the middle of the tape, you’ll be able to make out the old slot very clearly, giving you a good guide for the hacksaw).
It’s important to know how deep to cut the slots. Simply measure the depth of the underside of the fret to deduce this. Here you can see a craft knife, which has been marked with the height we need to cut, being used to check the depth after we have sawed a new slot.
We use a plastic-faced deadblow hammer to tap the frets into place. This type of hammer is very forgiving and will not damage the frets (well, unless you REALLY try), so you can just keep on tapping until they are nice and snug in the slots. I tapped the ends of the fret into place before tapping the middle. This helps the fret to not spring up at the edges at a later date.
Here's my hammer:
Once all of the frets have been installed, we can use a fret rocker to check if any of them are sitting too high. If so, we simply give them another tap or two to encourage them to go a bit lower.
The frets are fitted, but they’re sticking out of the sides of the neck, so we use a file to file them flush with the edge of the fretboard.
Then we taper the edges so we don’t rip our hands to shreds when it’s time to eventually play this thing.
We may have to do some more finishing work on the frets (namely leveling and crowning), but we won’t know until the whole guitar is put together, especially given this particular neck’s back bow.
In the meantime, here’s the (more or less) re-fretted neck.
Monday, October 31, 2011
Hofner Colorama II restoration project (part 2) - removing the frets and stripping (scraping) the lacquer from the guitar neck
The neck on this vintage Hofner Colorama II is going to get tackled before we deal with the guitar's other issues. The neck is in quite a state, with at least the following problems:
1. The frets need replacing (total refret).
2. The fingerboard is very uneven and needs re-radiusing (sanding down to the correct curvature again).
3. There is a long crack/gap running along the fingerboard that will need to be filled in (luckily this is not a structural problem).
4. The nut needs to be removed and replaced.
5. The old lacquer needs to be removed and the neck needs to be re-lacquered.
6. A new waterslide-decal logo needs to be made and applied.
7. The relief on the neck needs to be dealt with (it is back-bowed, even when the truss rod is completely loosened).
Today we will just deal with the stripping down stage.
First thing to do is remove the neck from the guitar as follows:
The machine heads (tuners) and string retainer are also removed, leaving us with this:
Before we can do any more work, the neck needs to be supported or clamped down in some way, so a quick neck rig is made from a piece of wood and a screw is passed from the back of that into one of the holes at the heel of the neck. A second screw passes through one of the machine head holes to hold the neck firmly (this can be removed, or moved to another hole, when doing any delicate work in that area).
STOP! Before continuing today’s post, if you ever decide to tackle a project like this, I cannot stress this enough…. WEAR SAFETY GLASSES. And for the sanding part and lacquer removal part, WEAR A MASK. You don’t want to be breathing that stuff into your lungs. You have been warned.
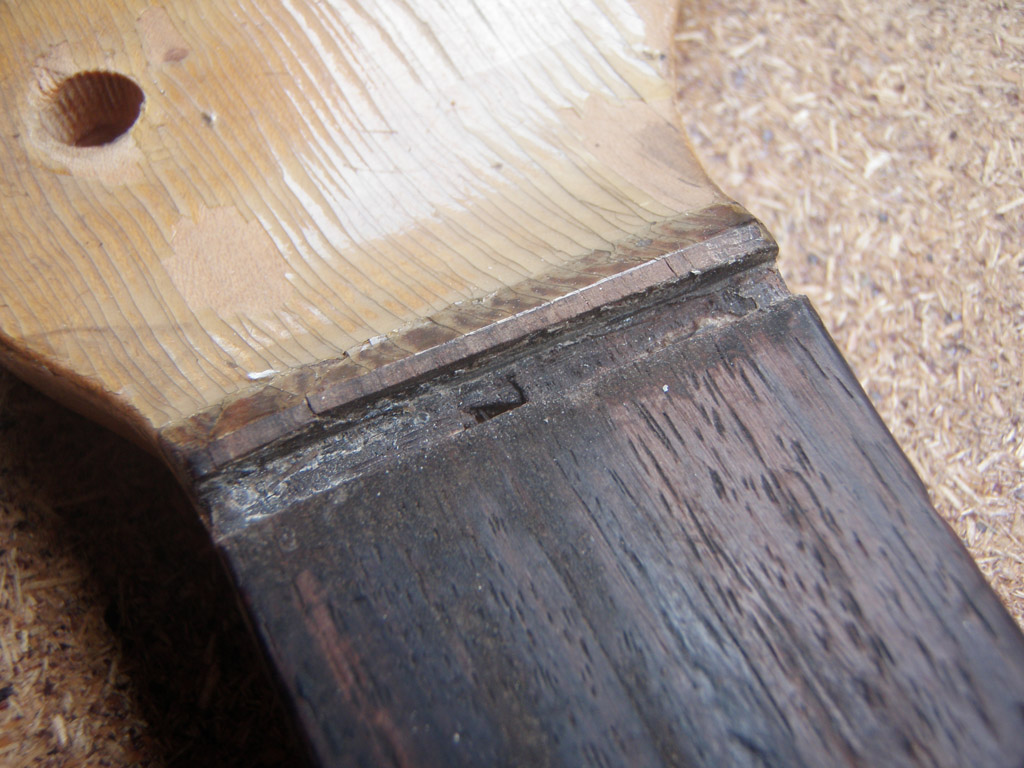
The nut is tapped out from the side using a hammer and some sort of straight punch. This one appears to have had a shim below it. With the shim removed it is clear that the nut slot will need to be cleaned out and leveled a little bit before a new one is installed.
Nut slot in need of work:
Filing out the nut slot:
A small pair of end cutting pliers are used to SLOWLY AND CAREFULLY remove the frets. Patience is a virtue at this stage. Any rushed movement will surely pull up a chunk of fretboard material by accident.
Once all of the frets have been removed, the fretboard looks something like this:
A radiused sanding block with 400 grade sandpaper is now used to sand the fretboard down. Some of the cowboy-chord finger positions are really worn down, but we will try to get the fretboard as good as possible without having to lower the entire surface by too much. Also, in an attempt to minimise the effect of the back bow, the fretboard is sanded more heavily towards the middle of the neck.
Neck relief (back bow):
Since a lot of lovely rosewood dust is getting spread all over the fretboard, and since, coincidentally, we need to fill in a big long crack, this is a perfect (and very convenient) time to drip superglue along the crack, sealing that dust into the gap. Once the superglue has dried, it is actually easier to remove any excess with a fine file, rather than clogging up the sandpaper. A bit more sanding with the radiused sanding block and we should be done with the fretboard.
The crack before we started sanding:
After a bit of sanding, you can see the crack getting filled with rosewood dust:
Superglue is applied along the length of the crack:
A similar technique was later used on the deepest gouge in the cowboy chord positions of the fretboard.
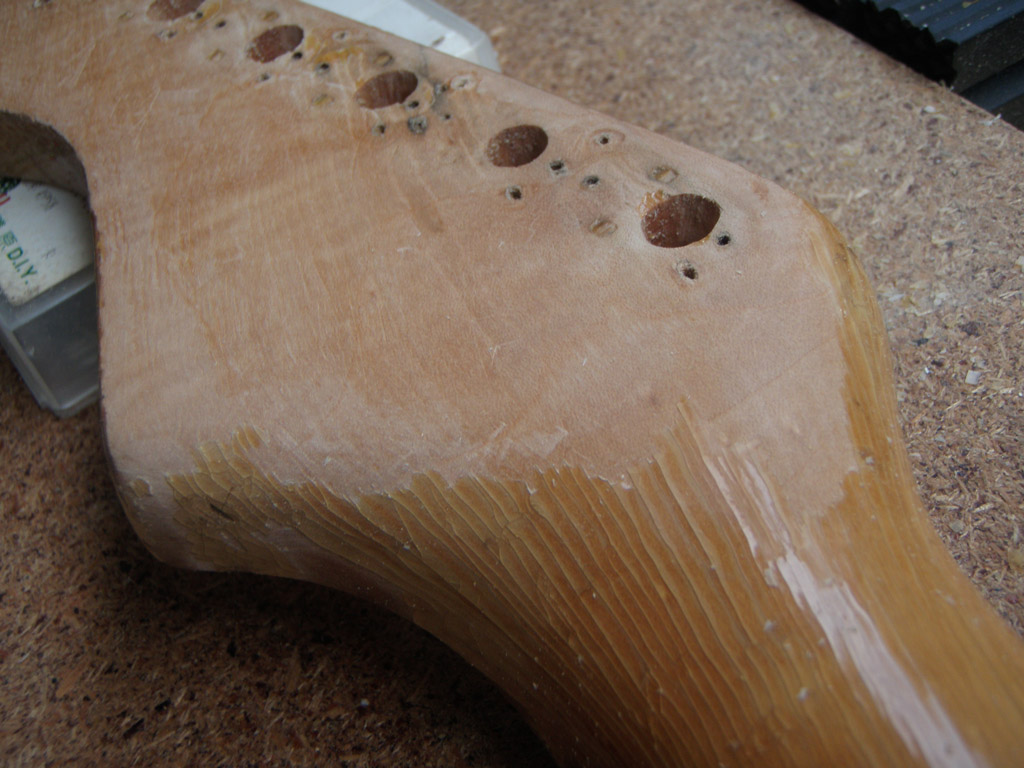
Now onto the lacquer removal. Since the lacquer is literally flaking off this neck, there is no doubt what the best method is to strip this – with a paint scraper. Here’s a picture of the peghead with the lacquer partially removed. It is very easy to see what has been removed and what hasn’t.
Here’s another picture of part of the back of the neck, also with some lacquer removed. Some areas were easier than others to remove lacquer from, but the outer edge of the peghead was by far the most difficult, especially around the lower edge.
And now here's the face of the peghead after scraping:
The tuners on this guitar have been replaced at least once, and a couple of the tuners have been replaced several times, leaving it with a LOT of holes where there shouldn’t be any. Luckily, most of these will actually be covered by the new tuners, but we would like to fill in these holes anyway, especially since some of them lie very close to where new holes will be and we don’t want any screws to be wandering into the wrong hole.
Screw holes:
Check with new tuners to see what will still be visible:
The quickest and easiest way to do this is by superglueing cocktail sticks into the holes as shown here:
The cocktail sticks are now snipped and filed/sanded down to the same level as the peghead. As mentioned, these will be mostly hidden from view, so no need to worry too much about how well they match the peghead wood.
With the fretboad re-radiused, the lacquer removed and the holes filled, the whole neck is given an all-over sanding. Unfortunately the original logo decal has left a type of sunblock tan line on the peghead, so short of making the new logo an exact fit, this may need to be sanded further. That said, a quick test with a black and white printout of the decal we have made up shows that it is a very close match already.
Old logo "tan line":
Black and white test printout of our new logo:
Similarly, the serial number needs attention. Here is how it looked before the lacquer was scraped off:
And here it is after. It's still there, but hard to see:
Stay tuned for the next post where we will be re-fretting the neck.
Tuesday, September 27, 2011
The vintage Hofner Colorama II restoration project (part 1)
Some of you may remember me mentioning the 1963 Hofner Colorama II (also known as the Hofner 164) that I bought a while back on ebay. What do you mean you don’t remember? I posted about it right here: http://diystrat.blogspot.com/2008/11/my-first-ever-electric-guitar.html
Oh wow, was that really three years ago? Who knew?
Anyway, as is always the danger when you buy something without seeing it in person first, especially a 50-year-old guitar, you never really know what sort of shape it’s going to be in. The photos showed a guitar that appeared to be in fairly average shape for its age and most of the original parts seemed to be there, but upon closer inspection it appeared that this particular guitar needed a lot more work than originally anticipated. In fact, I don’t think there’s a single part of this guitar that doesn’t need work in some way or another.
In that previous post, I mentioned that I completely messed with my original Hofner Colorama II almost 25 years ago, and so I feel like this is a chance to redeem myself. Kinda like adopting a puppy after inadvertently running over another one, or something like that.
Here’s a list of the main problems:
1. Neck – The neck is back bowed and the fretboard is both badly gouged in the cowboy chord positions and has a crack running the length of several frets. The frets themselves are badly worn in places too, so a total refret will be required. The neck needs to be completely re-lacquered, the tuners need replacing with something a bit closer to original (and the extra screw holes from the replacement tuners will need to be filled in too). The logo will need replacing due to having to re-lacquer the neck.
2. Body – The paint needs to be stripped and the body refinished. The paint is literally flaking off, and there are some cracks where the pieces of wood are joined.
3. Pickguard and back vibrato cover – Both plastic covers are warped and are now somewhat convex in shape. The screws have obviously been lost/replaced over time and are a bit of a (bad) mix now, so will need replacing.
4. Vibrato/tremolo – The thumbscrew that holds the vibrato arm on is missing and the arm is held on only because the threaded stud had been hammered down like a rivet, destroying it in the process. Also, the chrome vibrato cover has completely split where the screw at the front end goes in.
5. Bridge – The bridge has been replaced with one that has the wrong spacing, radius, and won’t intonate correctly, due to being straight across, so will need to be replaced (at least the top part).
6. Volume/tone knobs – Oh boy, would you look at the state of those? They're in dreadful condition and will all need to be replaced. The knob markers/pointers are also really, really rusty and will need a thorough cleaning.
7. Electronics – The pots are not behaving well at all (cutting out, very scratchy, etc.) and will need to be cleaned out. Additionally, one of the pickups does not appear to be behaving well, although that might (hopefully) be fixed after giving the pots some attention. The output jack could probably do with some attention too.
Wow, what a lot of work for just one guitar, but, hey, think how much FUN it’s going to be! Amirite? Plus, you know, this will totally sort me out with the Hofner karma police.
So stay tuned as all of these jobs get tackled over the next few posts.
Subscribe to:
Posts (Atom)